# Workspaces
When you sign up for a Pipedream account, you'll either create a new workspace or join an existing one if you signed up from an invitation.
You can create and join any number of workspaces. For example, you can create one to work alone and another to collaborate with your team. You can also start working alone, then easily add others into your existing workspace to work together on workflows you've already built out.
Once you've created a new workspace, you can invite your team to create and edit workflows together, and organize them within projects and folders (this feature is rolling out now).
# Creating a new workspace
To create a new workspace,
- Open the dropdown menu in the top left of the Pipedream dashboard
- Select New workspace
- You'll be prompted to name the workspace (you can change the name later)
# Workspace settings
Find your current workspace settings (opens new window) like current members, under the Settings navigation menu item on the left hand side. This is where you can manage your workspace settings, including the workspace name, members, and member permissions.
# Inviting others to a join a workspace
After opening your workspace settings, open the Membership (opens new window) tab.
- Invite people to your workspace by entering their email address and then clicking Send
- Or create an invite link to more easily share with a larger group (you can limit access to only specific email domains)

# Managing member permissions
By default, new workspace members are assigned the Member level permission.
Members will be able to perform general tasks like viewing, developing, and deploying workflows.
However, only Admins will be able to manage workspace level settings, like changing member roles, renaming workspaces, and modifying Slack error notifications.
# Promoting a member to admin
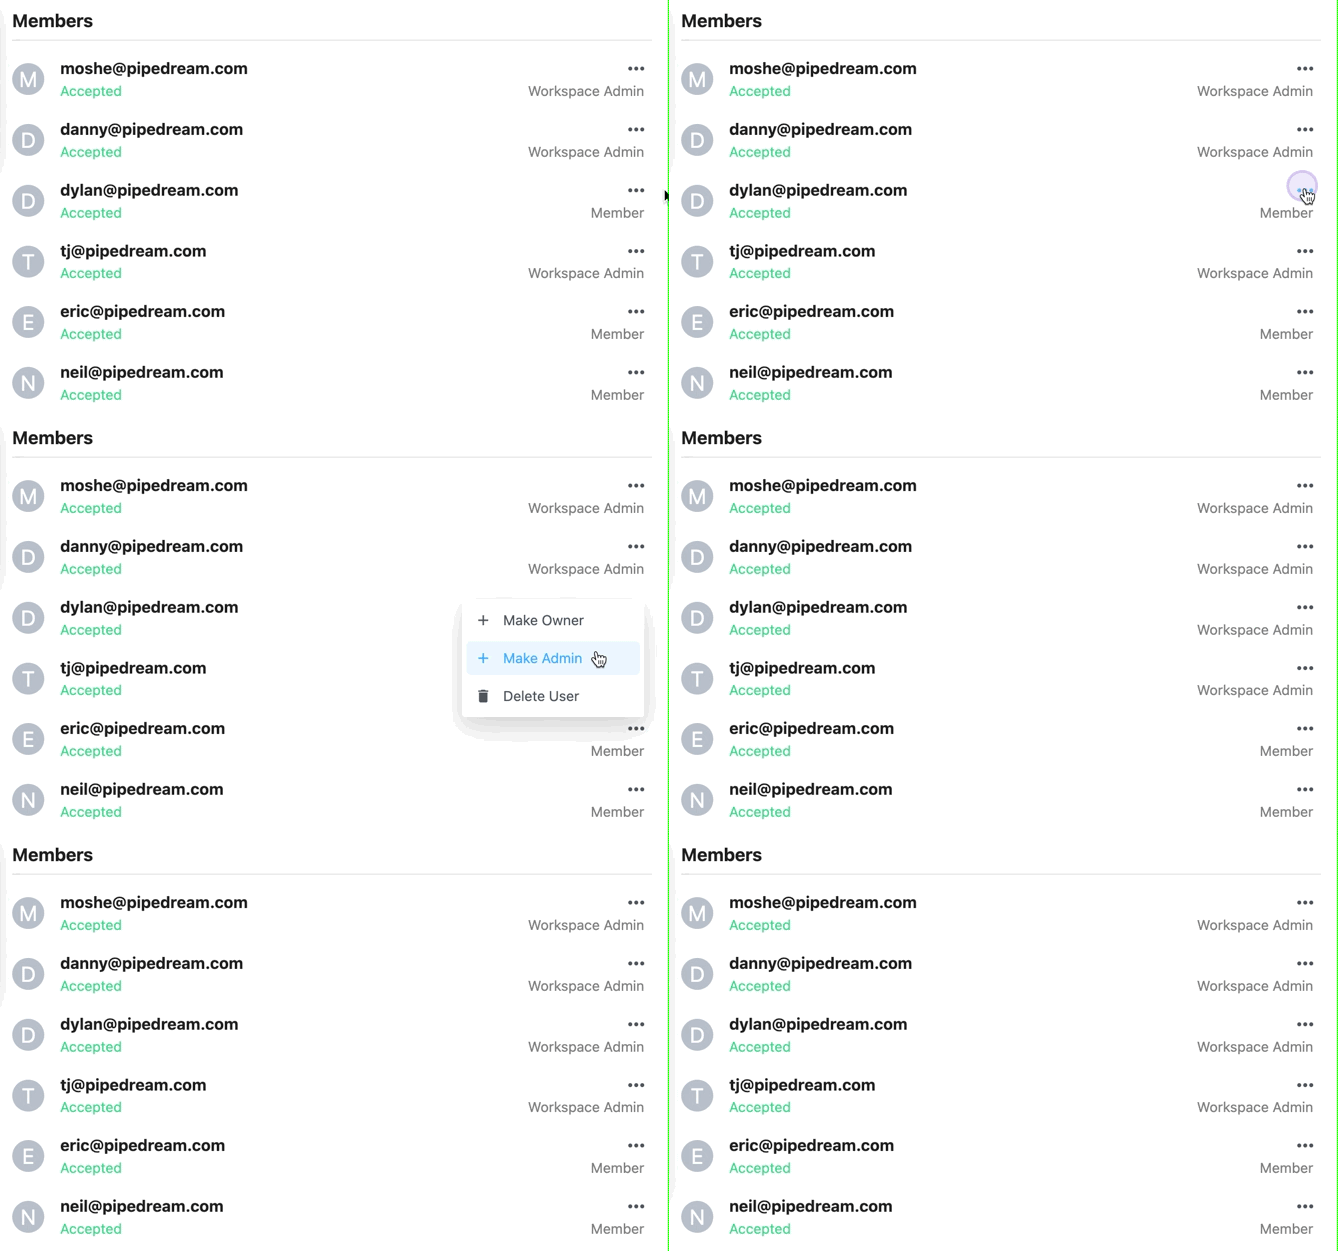
To promote a member to an admin level account in your workspace, click the 3 dots to the right of their email and select "Make Admin".

# Demoting an admin to a member
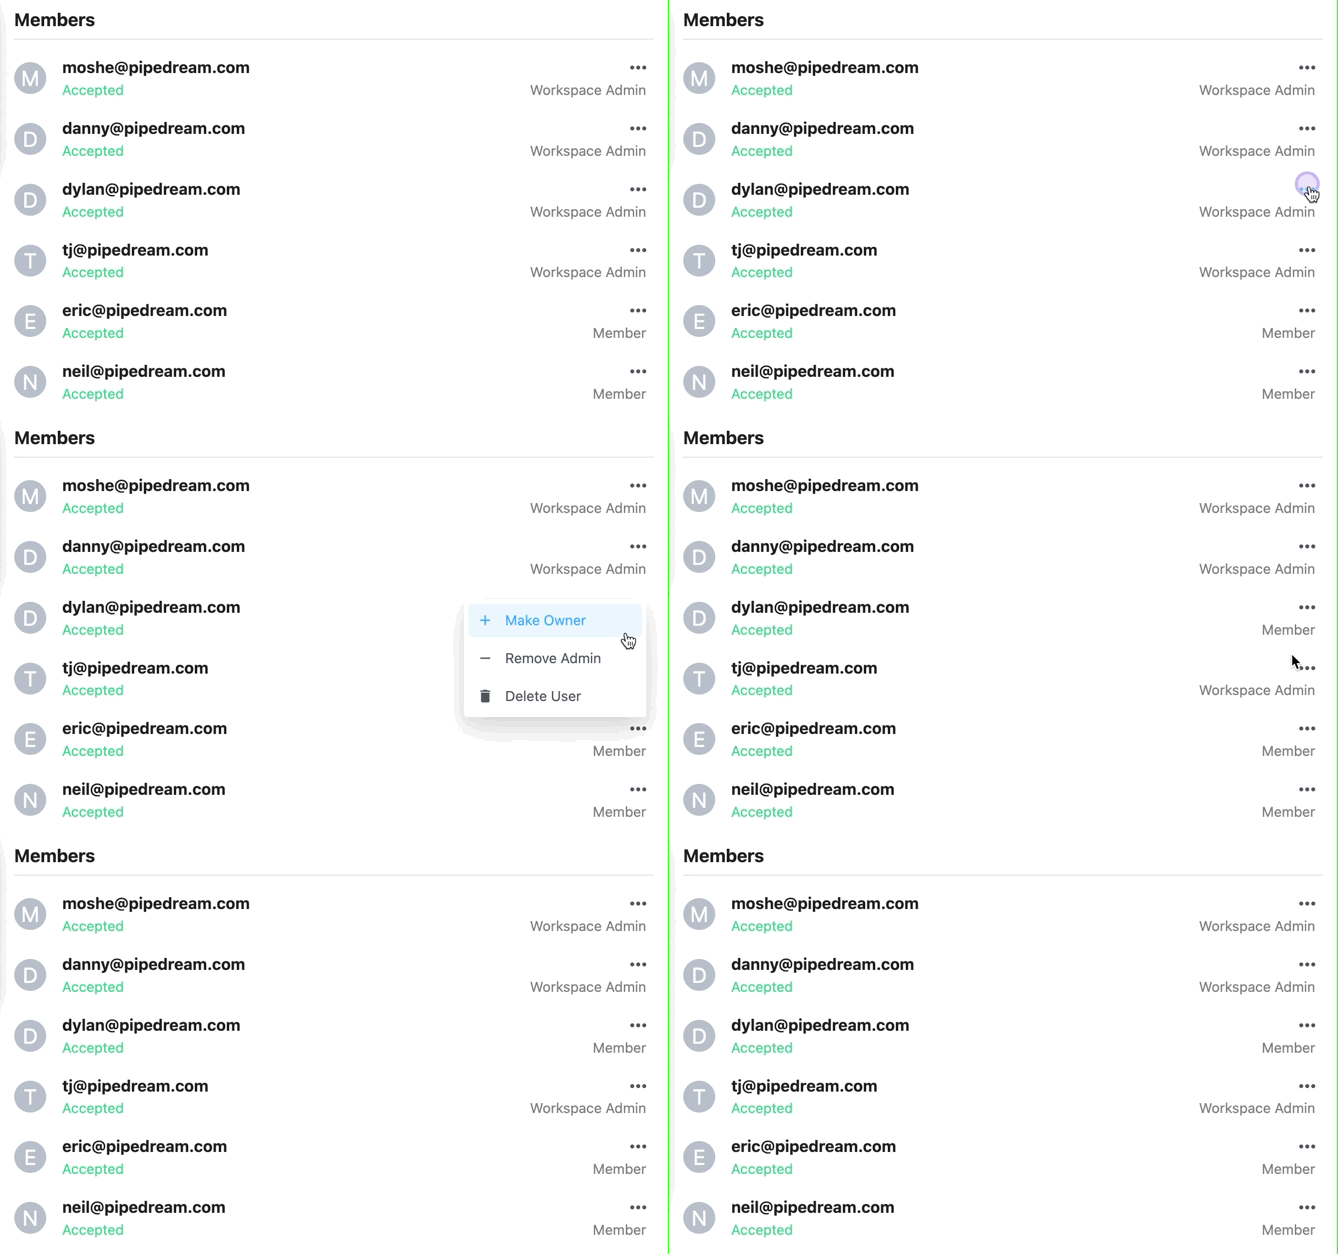
To demote an admin back to a member, click the 3 dots to the right of their email address and select "Remove Admin".

# Finding your workspace's ID
Visit your workspace settings (opens new window) and scroll down to the API section. You'll see your workspace ID here.
# Configuring Single Sign-On (SSO)
Workspaces on the Business and Enterprise plans can configure Single Sign-On, so your users can login to Pipedream using your identity provider.
Pipedream supports SSO with Google, Okta, and any provider that supports the SAML protocol. See the guides below to configure SSO for your identity provider:
# SCIM
Pipedream supports provisioning user accounts from your IdP via SCIM. Any workspace on the Business and Enterprise plans can configure Single Sign-On with SCIM.
# Renaming a workspace
To rename a workspace, open your workspace settings (opens new window) and navigate to the General tab.
Click the save button to save the changes.
TIP
This action is only available to workspace admins.
# Deleting a workspace
To delete a workspace, open your workspace settings and navigate to the Danger Zone.
Click the Delete workspace button and confirm the action by entering in your workspace name and delete my workspace into the text prompt.
WARNING
Deleting a workspace will delete all sources, workflows, and other resources in your workspace.
Deleting a workspace is irreversible and permanent.
# Switching between workspaces
To switch between workspaces, open the dropdown menu in the top left of the Pipedream dashboard.
Select which workspace you'd like to start working within, and your Pipedream dashboard context will change to that workspace.
